Do you want to create and customize your own WordPress form in Elementor?
Customizing a form for your website is a great way to showcase your specific branding, personalization, and intent. And with the intuitive builders offered by WPForms and Elementor, customization is a breeze.
In this article, we’ll show you how to customize your favorite WordPress forms in Elementor. Plus, we’re featuring some of our most popular form templates that you might want to get for yourself.
Create Your WordPress Form Now
Do I Need Elementor for WordPress?
You don’t necessarily have to get the Elementor plugin for your WordPress site, but it is incredibly useful.
Elementor is a page builder plugin that offers a drag-and-drop interface, making it ideal for those without strong coding skills or design expertise. It offers extensive customization, allowing you to create your desired website layouts and designs.
So, needing it for your WordPress website depends on your specific requirements and preferences. If you are comfortable with HTML, CSS, and have strong design skills, you may not need Elementor.
Elementor is available in both free and premium versions, so you can always start with the free version and upgrade if needed, making it adaptable to your needs.
How to Customize WordPress Forms in Elementor
Install and Activate the Plugins
It goes without saying that you’ll need both WPForms and Elementor to follow these steps here.

But we’ll go ahead and say it anyway: Be sure to install and activate the WPForms and Elementor plugins in your WordPress dashboard.
For complete directions on installing plugins on your website, check out this handy guide.
Now, you’re ready to start customizing. We’ll show you how to do it in Elementor, starting with the essentials needed for basic contact. Then, we’ll build on these elements (pun intended) for each form example as they get a bit more complex.
Want even more inspiration? Check out this different approach to adding and customizing WordPress forms in Elementor.
Contact Form
A Contact Form is one of the most necessary forms on your website, and remains our most popular form template.
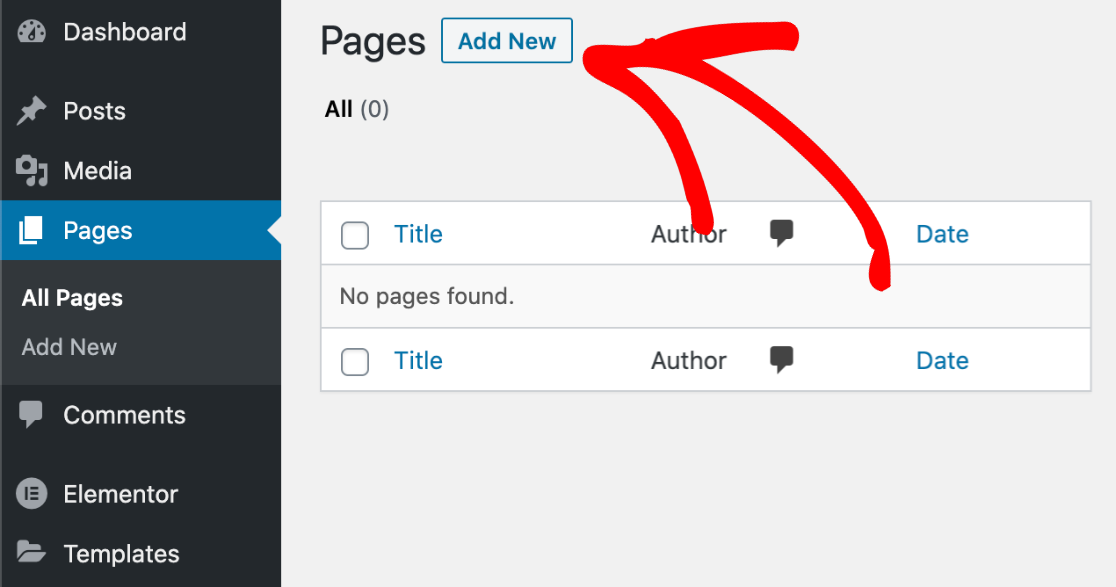
To create a Contact Form with Elementor, first navigate to your WordPress dashboard. Click on Pages from the sidebar, then Add New.
Then, click the blue Edit with Elementor button to load the Elementor page builder, which allows you to embed your contact form and tailor various page elements.

Now, the Elementor page builder will open, where you can drag and drop all kinds of blocks and elements to include on a page.
Go ahead and drag over the WPForms block and drop it on the page. Now, you can either select a form from a dropdown menu here, or you can add a new form.
Let’s click on + New Form to get our form into the block.
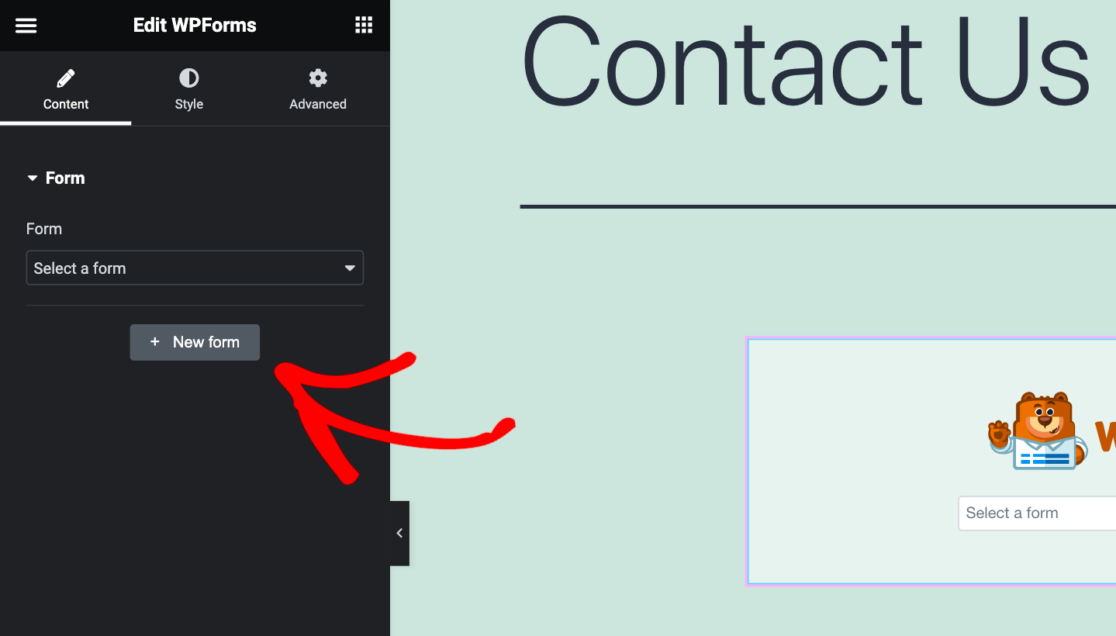
The WPForms builder will then load so that you can customize the form you want to use in Elementor.
First, Name Your Form by typing into the box at the top of the screen. We’ll name ours “Contact Form” so we know where and how to use it later.
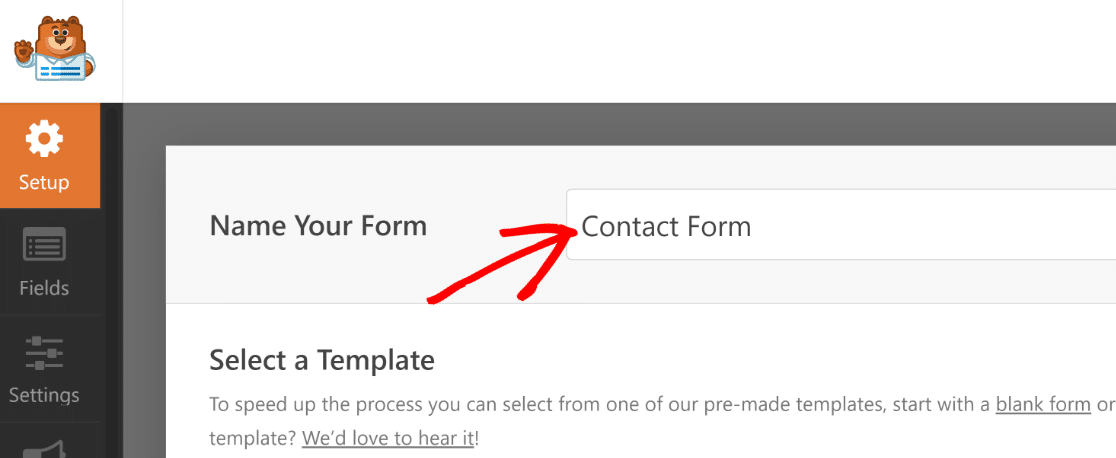
Then, Select a Template from the gallery to build your form.
You can use a blank form template to build your form from scratch, or you can get a head start by using a specific template that’s pre-made with all the necessary fields to get you going.
For our Contact Form, we’ll use a template.
You can either scroll down the page to browse templates, or you can search for something specific. Searching for a “Contact Form” for example, will yield all kinds of contact form templates for you to choose from.
We’ll use the Simple Contact Form template to build our form.
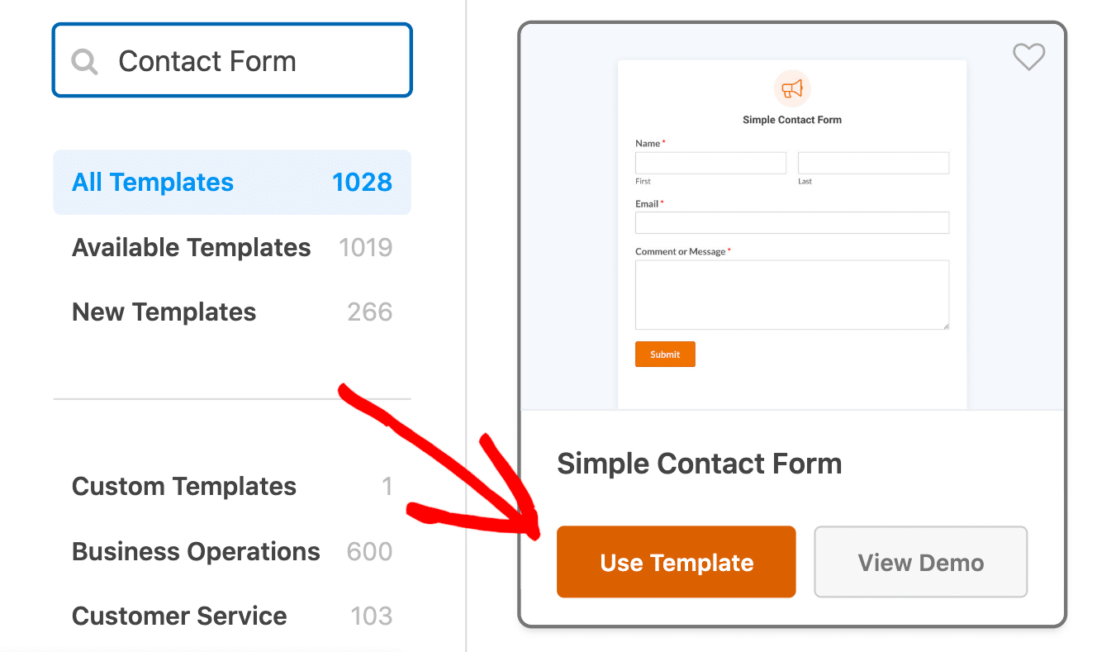
This is one of our most popular form templates, so we recommend you use it to reap its benefits, too!
And, as always, this form template is easy to customize with additional fields and settings. Simply click and hold on the desired field and drag it onto your form. Then, just click on the field to edit it.
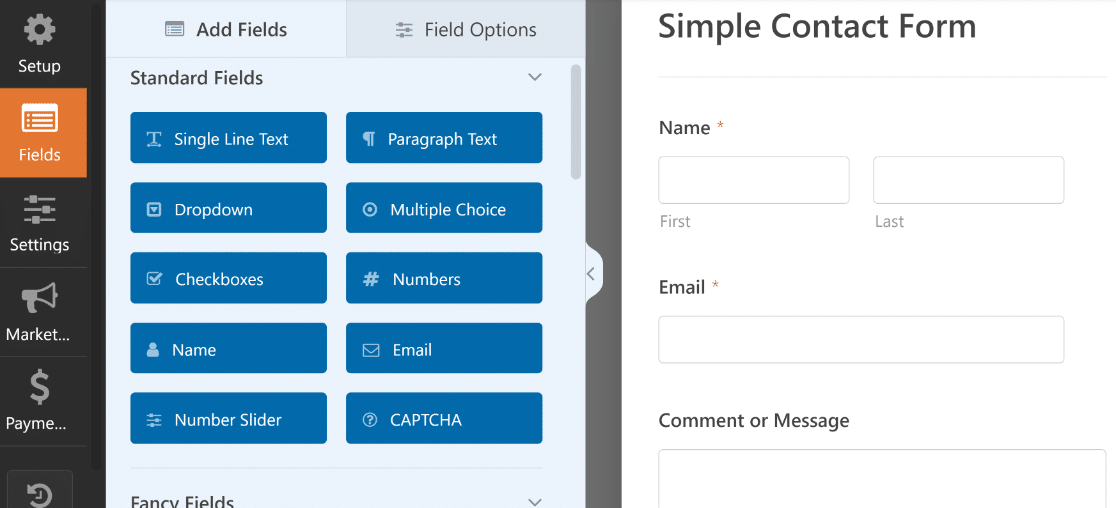
With the Simple Contact Form template, your form collects your user’s name, so that you can personalize any correspondence with them, and it also relays a message or comment from them to you.
An additional customization element to consider on your form is the confirmation message that your users receive when they submit their form. Navigate to the Settings section of the form builder, and click on the Confirmations tab.
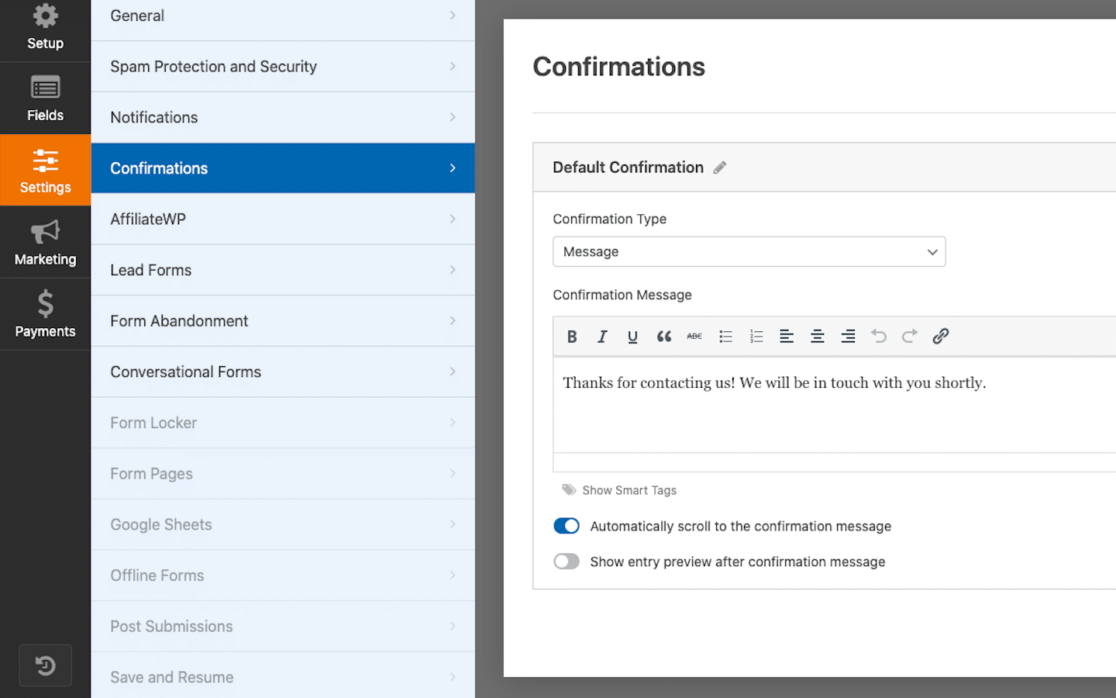
Here, you can edit the message that appears on the screen after your form user clicks “Submit.”
On our Simple Contact Form template, the confirmation message says, “Thanks for contacting us! We will be in touch with you shortly.”
As a note, all of the form templates we offer in our gallery come ready-made with a relevant Confirmation Message for your users, but we encourage you to edit this message however you see fit!
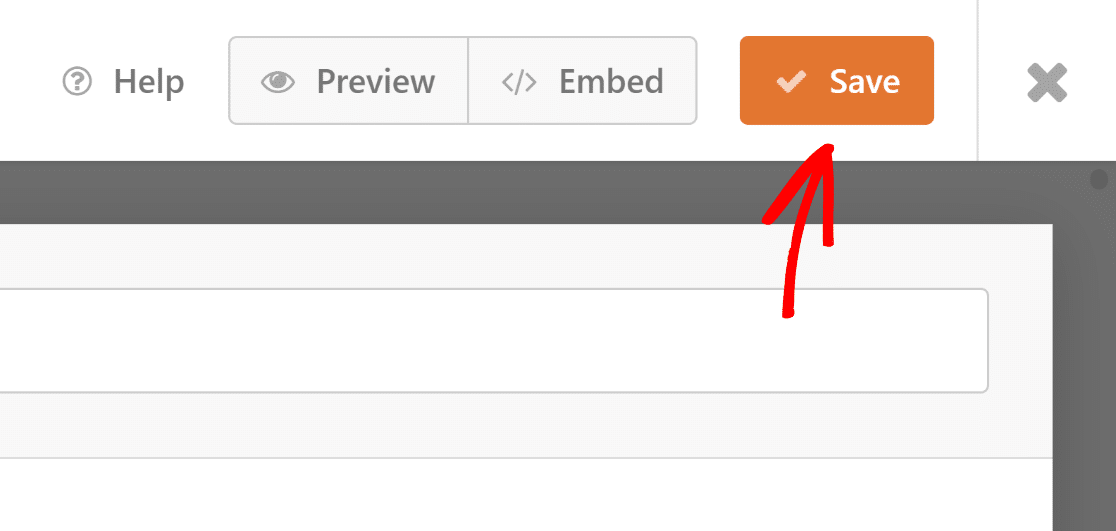
When you’re finished with any customizations to the form, click the Save button at the top. You can close the form builder by clicking the X at the right-hand corner of the form builder window.
Now, we’ll head back to the Elementor page builder.
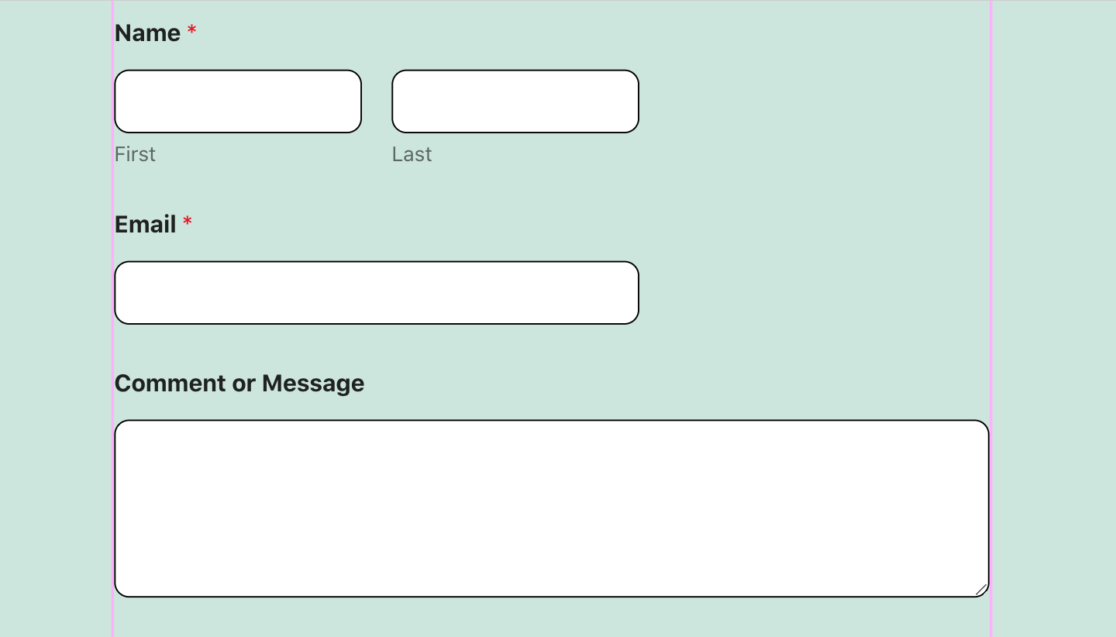
With our Contact Form Template embedded on the page, we can now customize the form styles. We can edit the styling of the fields, labels, buttons, and more.
On our form, we used the Field Style settings to increase the border radius and color with just a few clicks.
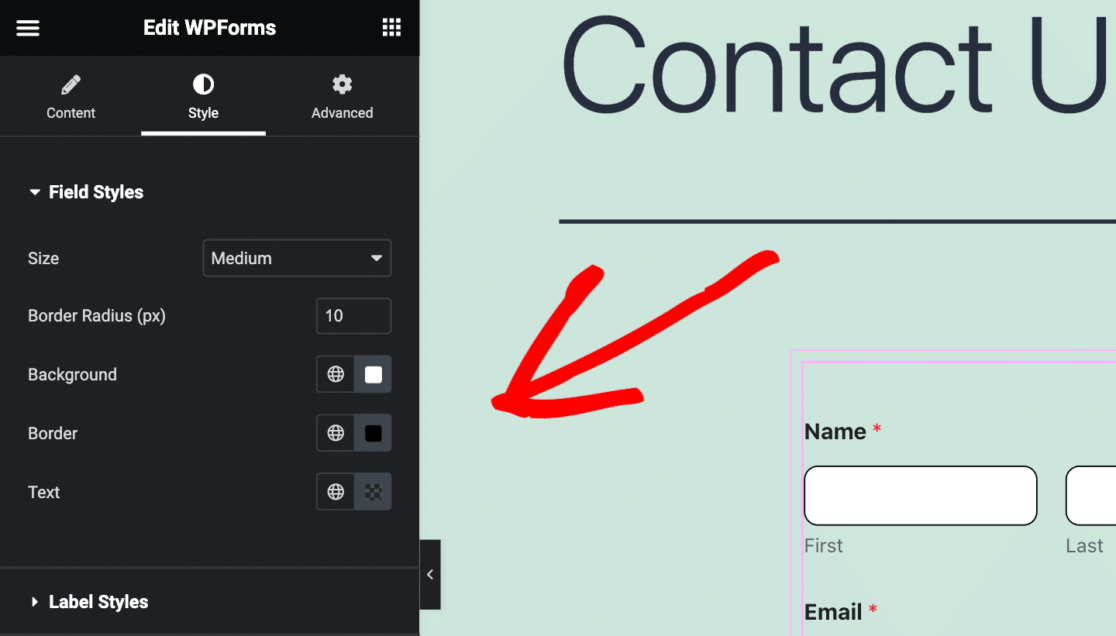
You can see how just a couple of quick customizations have quite an effect on the styling of this form page.
What sorts of styling will you come up with?
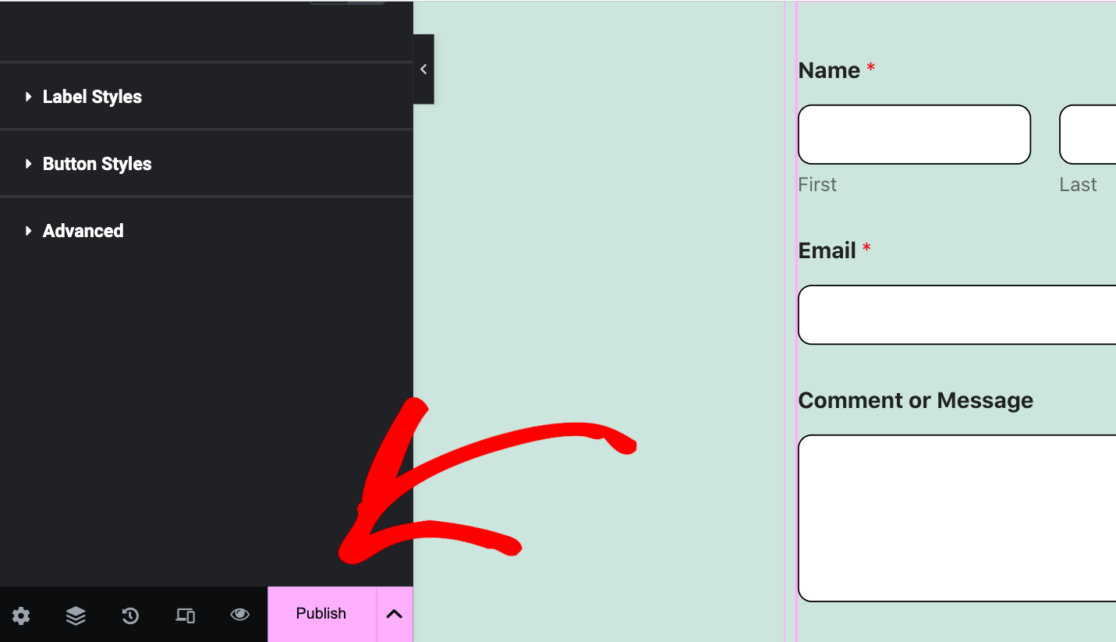
Be sure to publish your form page when you’ve finished customizing the form styles.
Simply click on the Publish button at the bottom toolbar.
Now, we’ll build upon these steps to customize more form pages with Elementor.
Newsletter Signup Form
Another common type of form you might want on your website is a Newsletter Signup Form.
To customize this form in Elementor, you’ll start with the first steps from above: adding and editing a new page with Elementor, using the WPForms block to add a new form, and selecting a template to use as for the form.
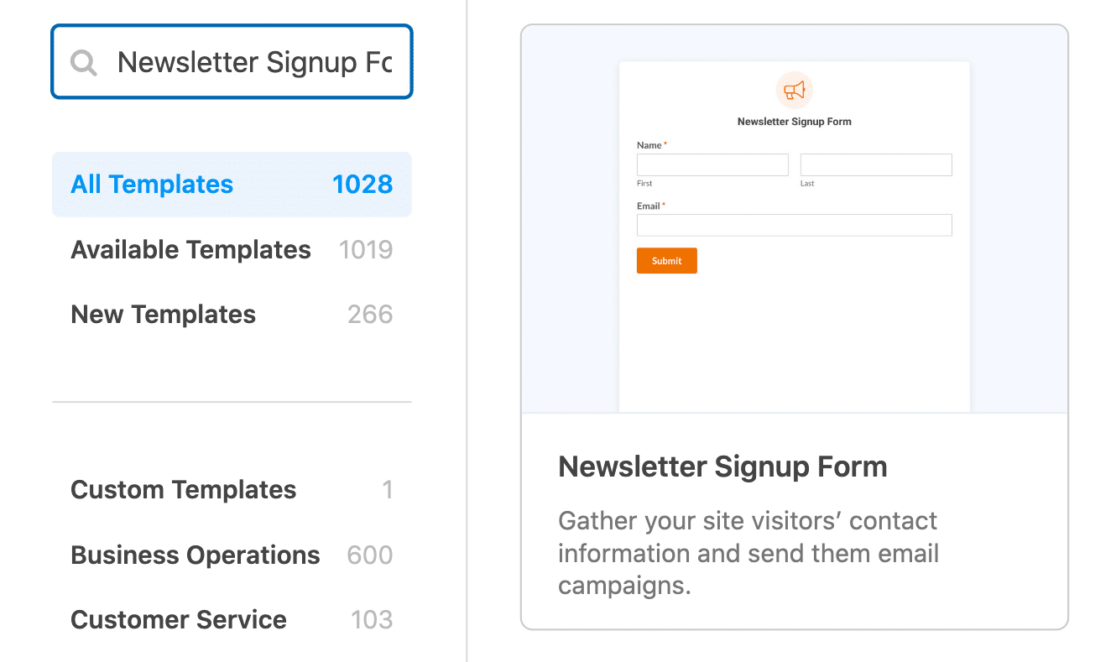
Since this form is one that your site visitors will use to sign up to receive newsletters from you, you’ll want a template that includes fields to collect their names and email addresses.
So, we’ll use the Newsletter Signup Form Template.
Then, you can use the form builder to include additional fields like a terms and conditions checkbox, custom CAPTCHA to prevent spam signups, and even geolocation features.
As for the confirmation message, it’s once again taken care of for you thanks to the template.
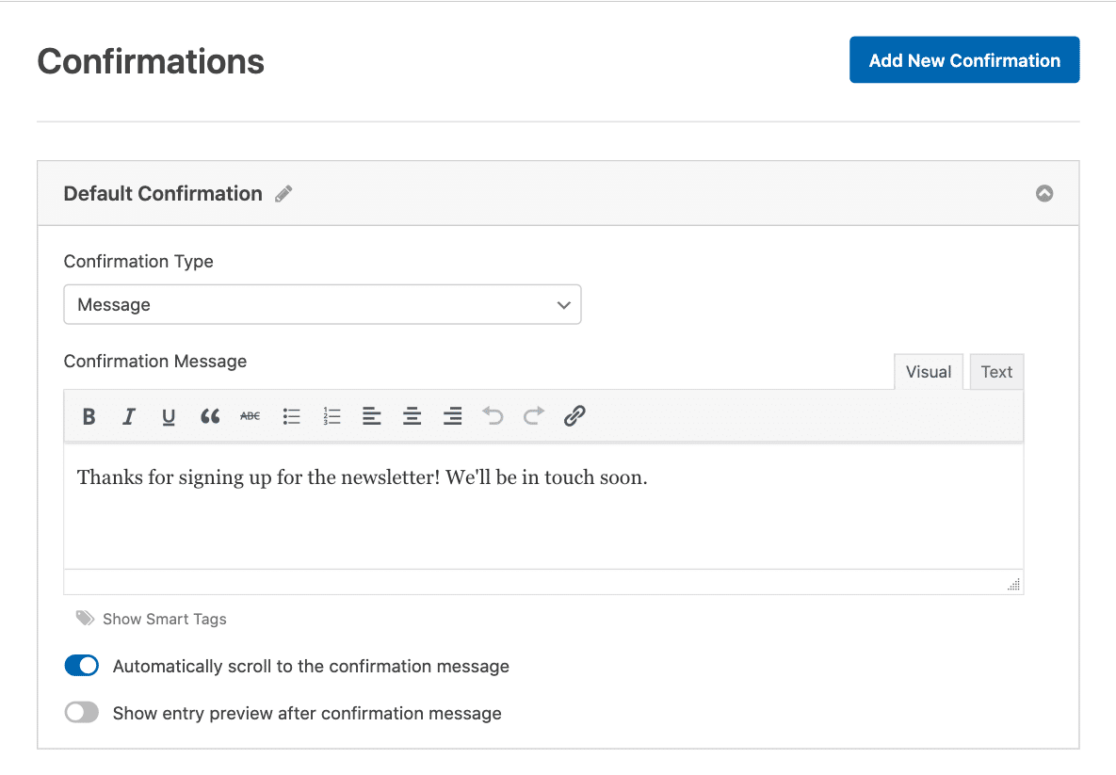
Like always, we encourage you to write whatever message you’d like your new subscribers to receive. In the meantime, it says, “Thanks for signing up for the newsletter! We’ll be in touch soon.”
Don’t forget to to save your Newsletter Signup Form whenever you’re finished with it, before exiting.
Then, back in Elementor, we can once again customize the form’s styling. This time, let’s change the Field Styles, Label Styles, and Button Styles.
We’ll go ahead and customize the Field Styles here like we did on the contact form above: increasing the border radius to 10 pixels and changing its color to black.
Now, let’s also focus on the Label Styles. To make the labels on the form more prominent, increase their size. Let’s also choose a fun color to use for the error messaging. You can see this color used for the asterisks on the field labels.
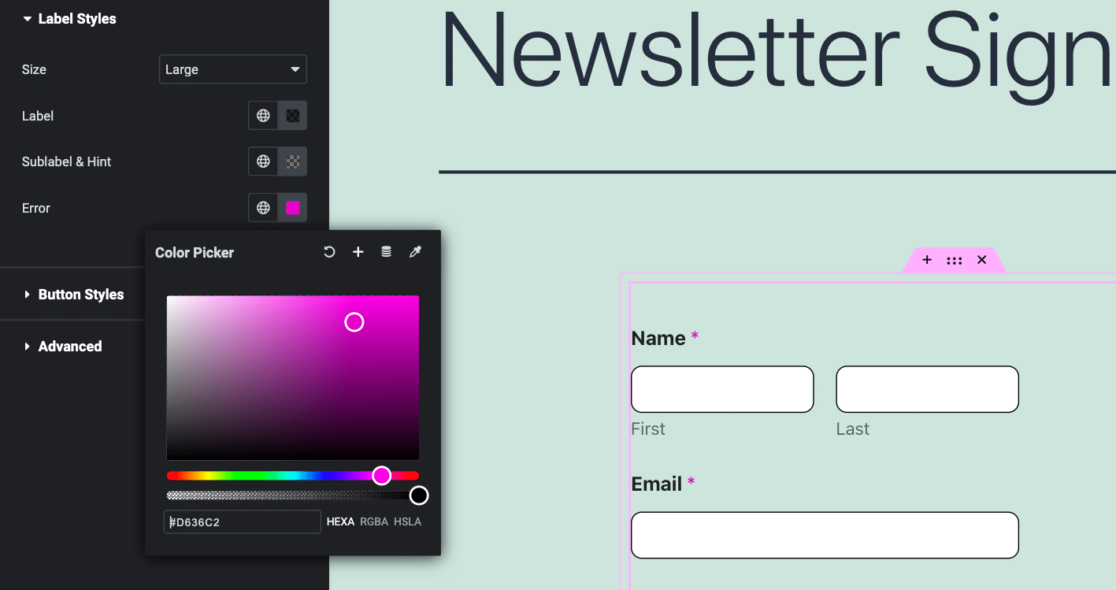
Then, turn your attention to the Submit button.
As you can see on our form, we’ve used the Button Styles to increase the size of the button, along with the colors of the background and border to match the rest of our styling.
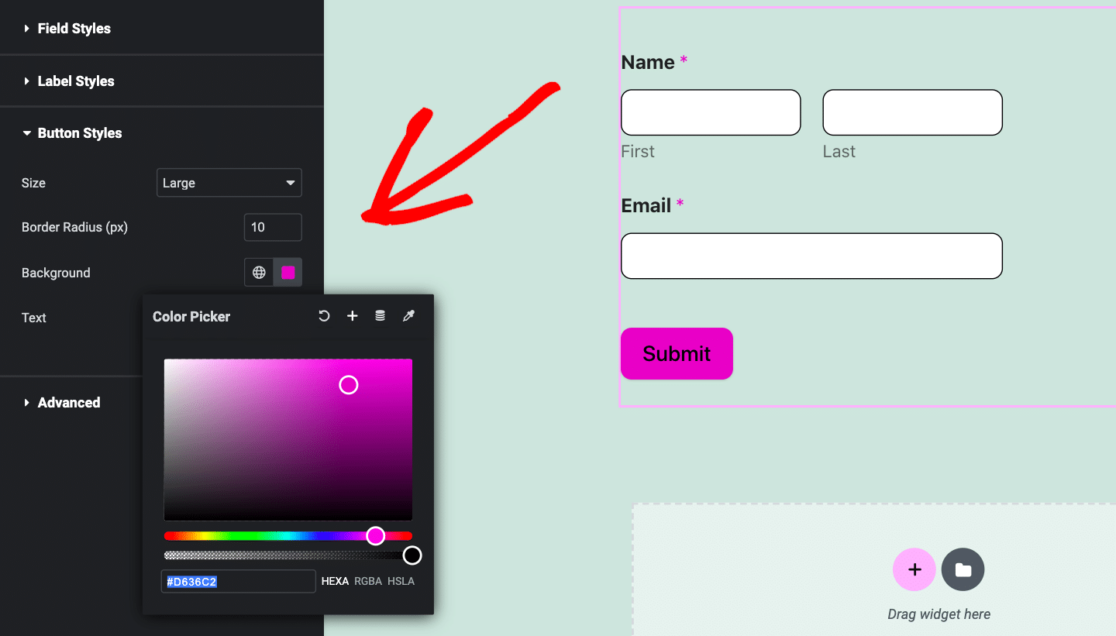
And to get a perfect color match, we simply copied the pink color we chose with the color picker in the Label Styles, and pasted it into the Background color picker for the Button Styles.
Next, we’ll get even more creative with all of the form styling options in Elementor.
Camp Registration Form
Registration forms are some of our most sought-after templates, with form templates for camp registrations being the highest in demand, recently.
We’re going to skim over most of the steps we’ve already covered here, and jump right into selecting a form template from WPForms.
For this form, go ahead and grab the Girl Scout Camp Registration Form template from the selection in our gallery.
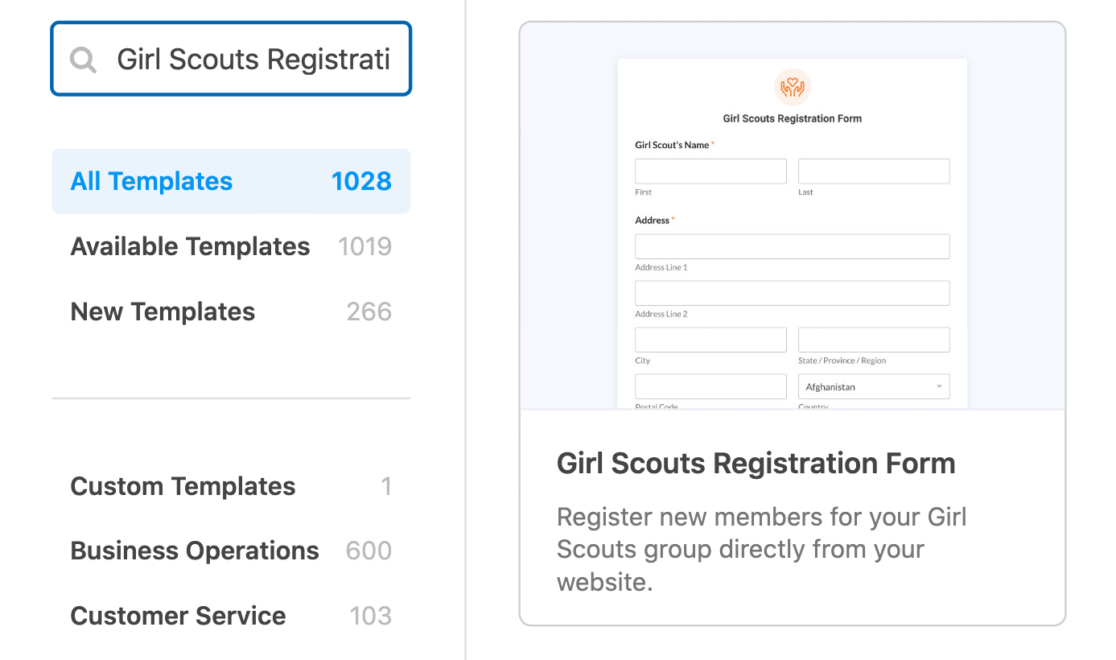
We won’t worry too much about editing the form fields or confirmation message, though you’re more than welcome to customize the template to match your organization’s needs.
Then, within the Elementor page builder, we’re going to work in the Advanced settings.
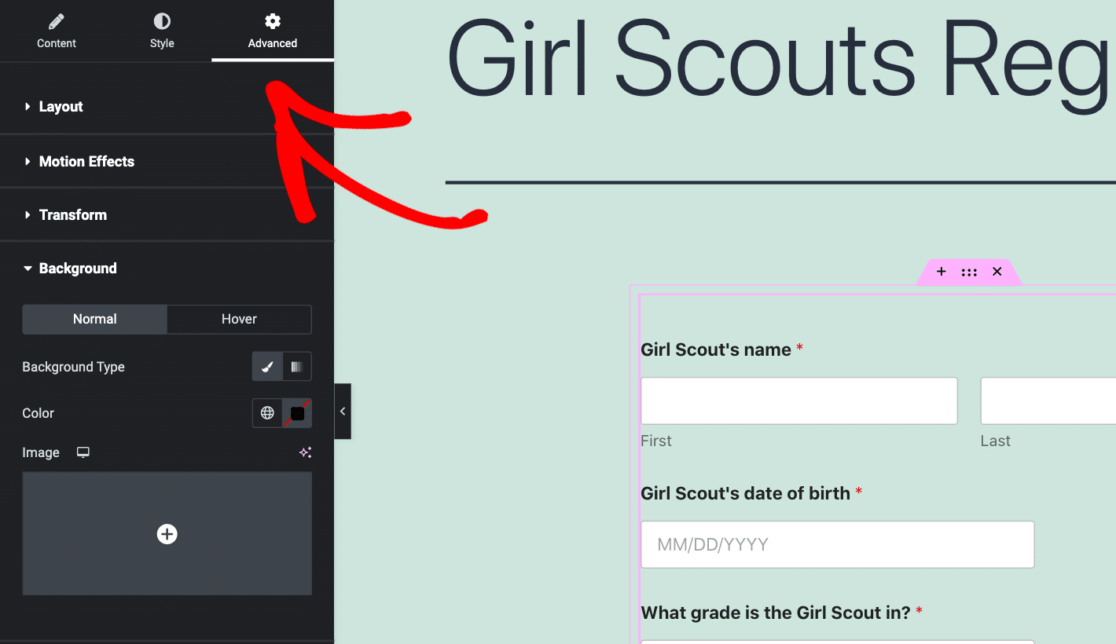
This tab of settings lets us do so much in terms of styling with the WPForms block, including uploading an image for a custom background.
Click on the Background tab below the Advanced settings to create your background. and make sure that the Background Type is on Classic.
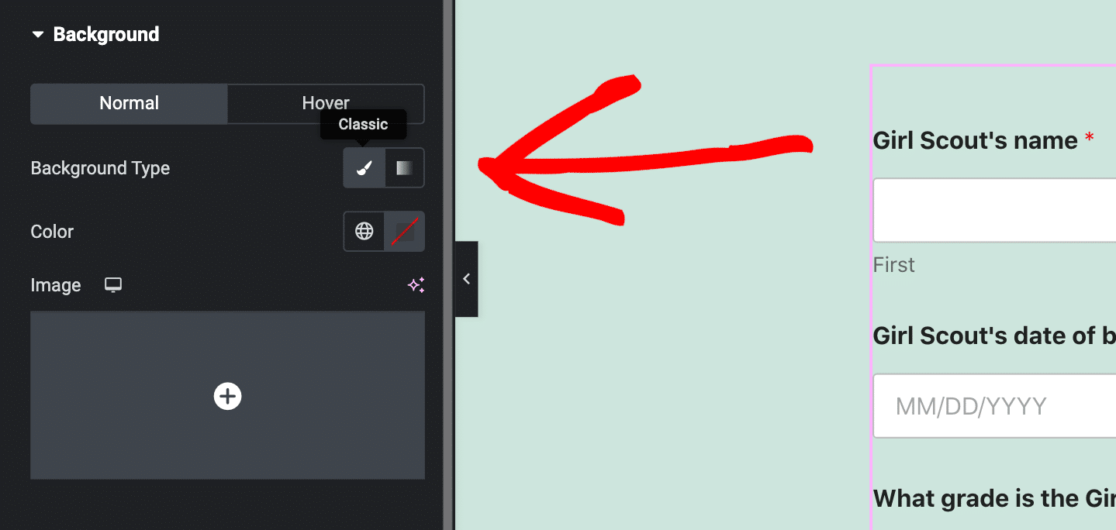
Then you can upload an image to be the background displayed in the WPForms block.
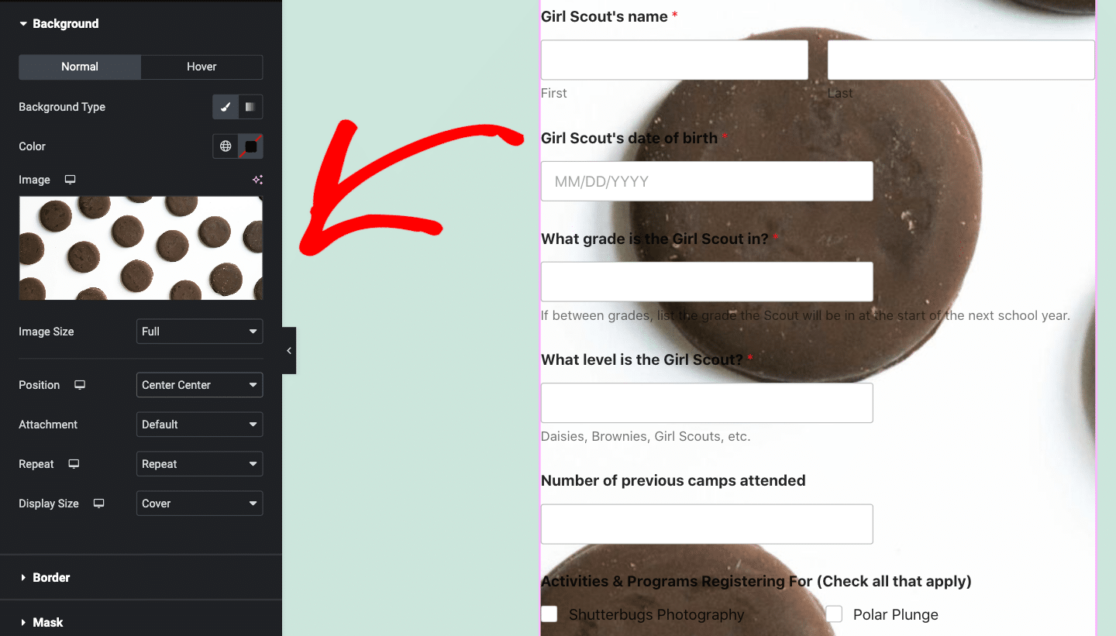
While it does take some configuring of the background’s image size, position, and other elements, this customization feature is worth the effort.
With our example above, for instance, we’d probably like to edit the text colors, margins and alignment, and other elements of the form before publishing.
Customer Order Form
We can’t write an article featuring form templates and not mention our order form templates.
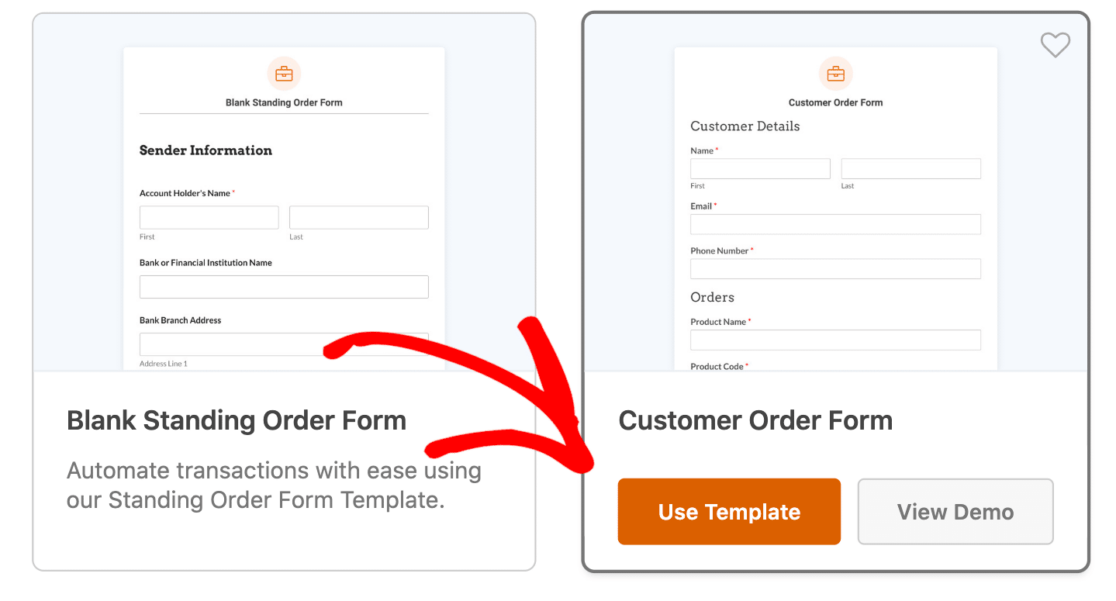
We’re once again going to skip the steps we’ve already covered, and get right to customizations. For our form here, we’ll use our most popular order form template: the Customer Order Form Template.
Now, we’re going back to the WPForms block Advanced settings. We’re also revisiting the Background tab, but this time, the Background Type is Gradient.
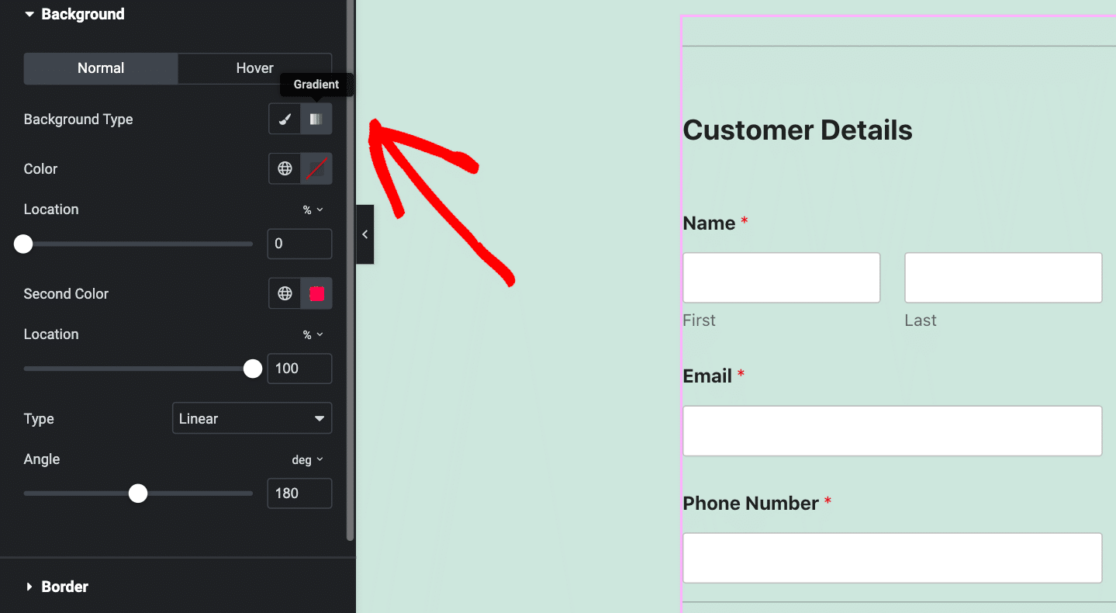
With the Gradient settings, you can mix and match any sort of color pairing you can come up with, which will be applied in a gradient across the background of your order form.
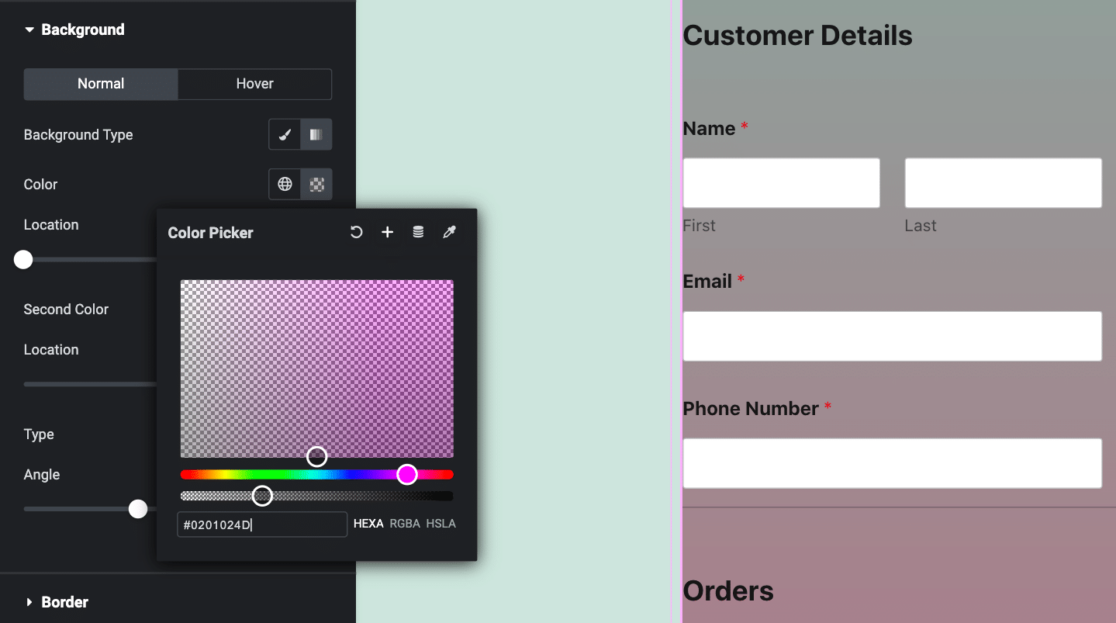
The end result is stunning and the customization options are endless.
Now, this is just barely scratching the surface of all of the customization and styling options you have with WPForms and Elementor. So, be sure to take a look at our additional Elementor tutorials and articles.
Create Your WordPress Form Now
Next, Connect Elementor Forms to Google Sheets
Congratulations! You’re well on your way to creating awesome forms in Elementor.
Now, try connecting these forms to Google Sheets. While Elementor can store your form entries inside your WordPress dashboard, there are times when you may want to keep a copy of your form entries and leads in a Google Sheet.
So, check out our tutorial to learn how!
Ready to build your form? Get started today with the easiest WordPress form builder plugin. WPForms Pro includes lots of free templates and offers a 14-day money-back guarantee.
If this article helped you out, please follow us on Facebook and Twitter for more free WordPress tutorials and guides.
The post How to Customize WordPress Forms in Elementor [+ TEMPLATES] appeared first on WPForms.